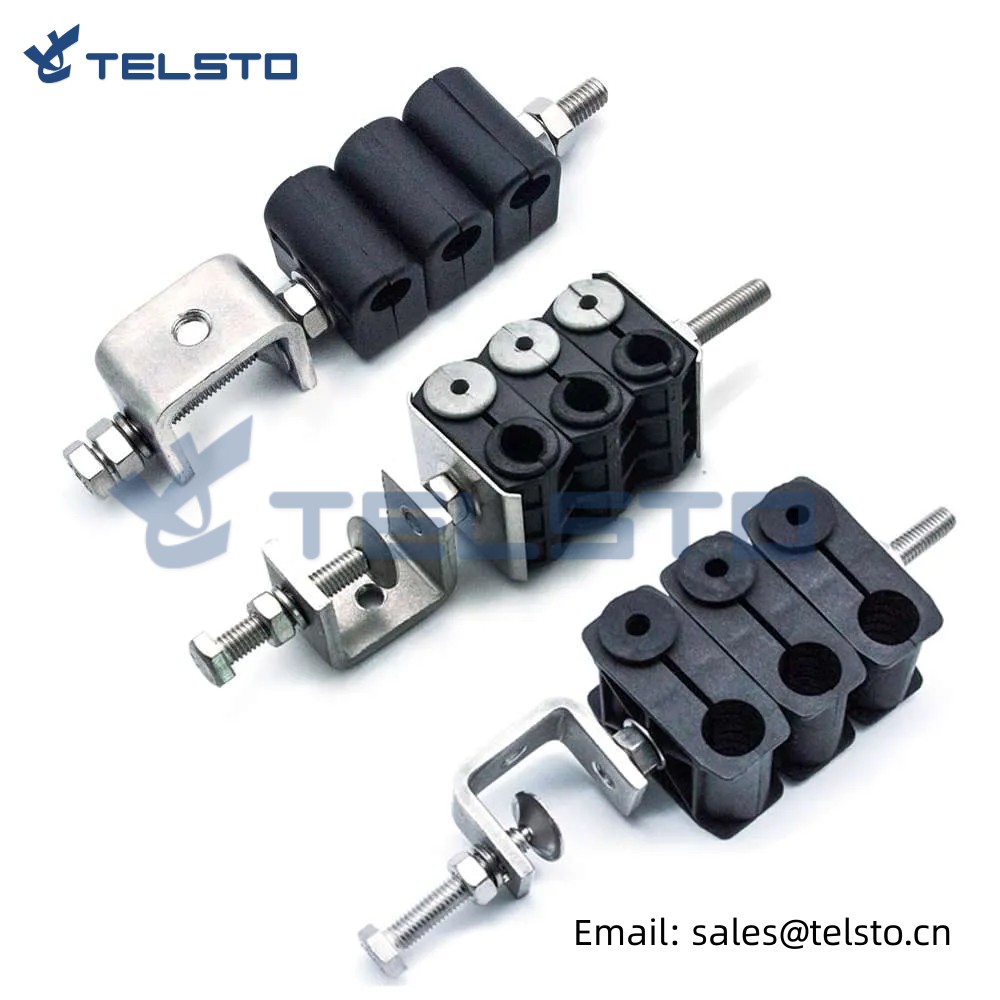
Stainless steel coated cable ties
Main Features:
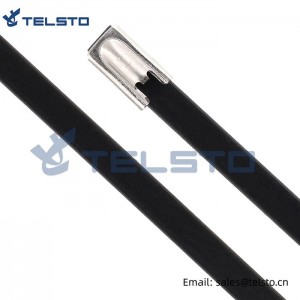
1) Stainless steel cable ties are ideal for bundling wires hoses, cables, poles, pipes etc. in harsh environmental condition.
2) Used in applications where corrosion,vibration, general weathering, radiation and temperature extremes are a concern.
3) Self locking,ball bearing mechanism for quick and easy installation, either by hand or by tensioning tool.
4) Material: #304, #316 stainless steel.
5) Surface Treatment: PVC Coated.

|
Part No. |
Length(L) |
Width(W) |
Bundle Diameter(E) |
Tensile Strength |
||
|
Inch |
MM |
MM |
MM |
LBS |
KGS |
|
| TEL-CTSC-4.6×150 |
5.9″ |
150 |
4.6 |
37 |
135 |
61 |
| TEL-CTSC-4.6X200 |
7.87″ |
200 |
50 |
|||
| TEL-CTSC-4.6X250 |
9.84″ |
250 |
63 |
|||
| TEL-CTSC-4.6X300 |
11.8″ |
300 |
76 |
|||
| TEL-CTSC-4.6X350 |
13.78″ |
350 |
89 |
|||
| TEL-CTSC-4.6X400 |
15.57″ |
400 |
102 |
|||
| TEL-CTSC-4.6X450 |
17.72″ |
450 |
115 |
|||
| TEL-CTSC-4.6X500 |
19.69″ |
500 |
128 |
|||
| TEL-CTSC-4.6X550 |
21.65″ |
550 |
141 |
|||
| TEL-CTSC-4.6X600 |
23.62″ |
600 |
154 |
|||
| TEL-CTSC-7.9×150 |
5.9″ |
150 |
7.9 |
37 |
180 |
81 |
| TEL-CTSC-7.9×200 |
7.87″ |
200 |
50 |
|||
| TEL-CTSC-7.9×250 |
9.84″ |
250 |
63 |
|||
| TEL-CTSC-7.9×300 |
11.8″ |
300 |
76 |
|||
| TEL-CTSC-7.9×350 |
13.78″ |
350 |
89 |
|||
| TEL-CTSC-7.9×400 |
15.57″ |
400 |
102 |
|||
| TEL-CTSC-7.9×450 |
17.72″ |
450 |
115 |
|||
| TEL-CTSC-7.9×500 |
19.69″ |
500 |
128 |
|||
| TEL-CTSC-7.9×550 |
21.65″ |
550 |
141 |
|||
| TEL-CTSC-7.9×600 |
23.62″ |
600 |
154 |
|||
| TEL-CTSC-7.9×650 |
25.59 |
650 |
167 |
|||
| TEL-CTSC-7.9×700 |
27.56″ |
700 |
180 |
|||
| TEL-CTSC-7.9×750 |
29.53″ |
750 |
191 |
|||
| TEL-CTSC-7.9×800 |
31.5″ |
800 |
193 |
|||
| TEL-CTSC-12×150 |
5.9″ |
150 |
12 |
37 |
270 |
122 |
| TEL-CTSC-12×200 |
7.87″ |
200 |
50 |
|||
| TEL-CTSC-12×250 |
9.84″ |
250 |
63 |
|||
| TEL-CTSC-12×300 |
11.8″ |
300 |
76 |
|||
| TEL-CTSC-12×350 |
13.78″ |
350 |
89 |
|||
| TEL-CTSC-12×400 |
15.57″ |
400 |
102 |
|||
| TEL-CTSC-12×450 |
17.72″ |
450 |
115 |
|||
| TEL-CTSC-12×500 |
19.69″ |
500 |
128 |
|||
| TEL-CTSC-12×550 |
21.65″ |
550 |
141 |
|||
| TEL-CTSC-12×600 |
23.62″ |
600 |
154 |
|||
| TEL-CTSC-12×650 |
25.59 |
650 |
167 |
|||
| TEL-CTSC-12×700 |
27.56″ |
700 |
180 |
|||
| TEL-CTSC-15X200 |
7.87″ |
200 |
15 |
50 |
337 |
152 |
| TEL-CTSC-15X250 |
9.84″ |
250 |
63 |
|||
| TEL-CTSC-15X300 |
11.8″ |
300 |
76 |
|||
| TEL-CTSC-15X350 |
13.78″ |
350 |
89 |
|||
| TEL-CTSC-15X400 |
15.57″ |
400 |
102 |
|||
| TEL-CTSC-15X450 |
17.72″ |
450 |
115 |
|||
| TEL-CTSC-15X500 |
19.69″ |
500 |
128 |
|||
| TEL-CTSC-15X550 |
21.65″ |
550 |
141 |
|||
| TEL-CTSC-15X600 |
23.62″ |
600 |
154 |
|||
| TEL-CTSC-15X650 |
25.59 |
650 |
167 |
|||
| TEL-CTSC-15X700 |
27.56″ |
700 |
180 |
|||
| TEL-CTSC-15X750 |
29.53″ |
750 |
191 |
|||
| TEL-CTSC-15X800 |
31.5″ |
800 |
193 |
|||
| TEL-CTSC-15X1000 |
39.37″ |
1000 |
206 |
|||
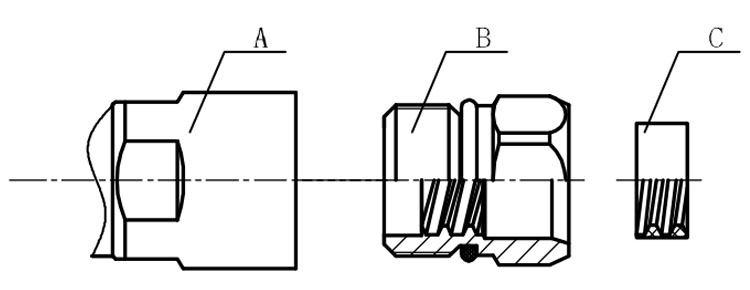
Installation Instructions of N or 7 / 16 or 4310 1 / 2″ super flexible cable
Structure of connector: ( Fig1 )
A. front nut
B. back nut
C. gasket
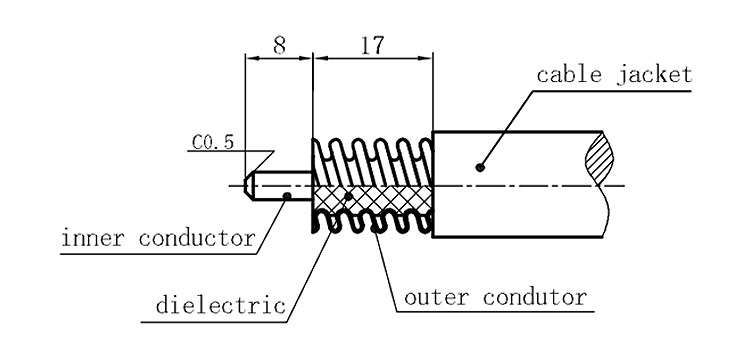
Stripping dimensions is as shown by diagram ( Fig2 ), attention should be paid while stripping:
1. The end surface of inner conductor should be chamfered.
2. Remove impurities such as copper scale and burr on the end surface of the cable.
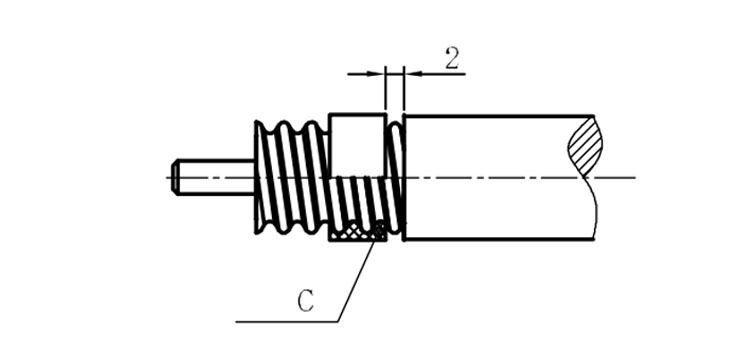
Assembling the sealing part: Screw the sealing part in along the outer conductor of the cable as shown by the diagram ( Fig3).
Assembling the back nut (Fig3).
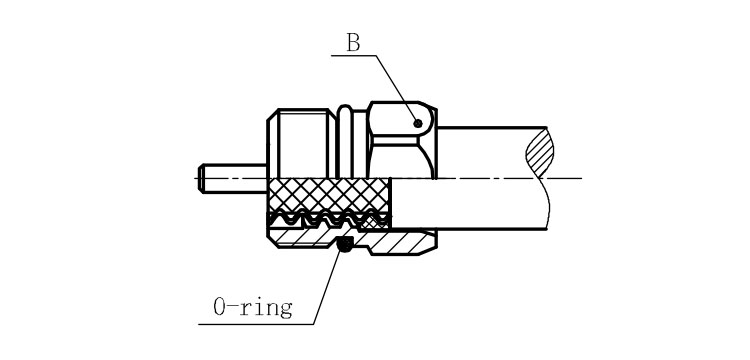
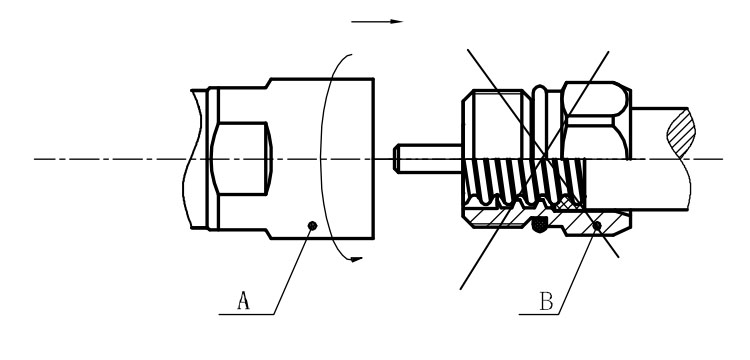
Combine the front and back nut by screwing as shown by diagram ( Figs( 5)
1. Before screwing, smear a layer of lubricating grease on the o-ring.
2. Keep the back nut and the cable motionless, Screw on main shell body on back shell body. Screw down main shell body of back shell body using monkey wrench. Assembling is finished.
